Before and After
Spring time is just around the corner. It wont be long and we’ll all be wearing shorts in the 65 degree weather. Last summer and fall I had the privilege of updating or building decks for so many clients. Call me at 513-404-8154 or email mitchellhomesolution@gmail.com or http://www.mitchellhomesolution.com.
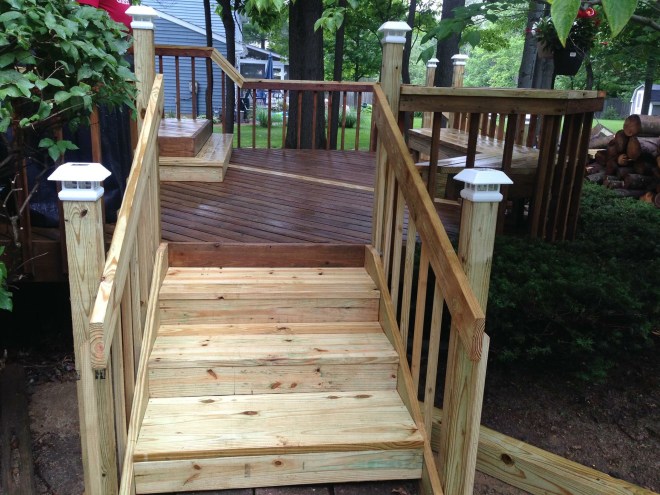
Here is a before and after of a deck being brought back to life.


10 Easy Steps To Refurb Your Deck
- UV rays penetrate wood, which causes graying. Deck cleaners help remove dirt, nail stains, algae and mildew. If your deck isn’t brand-new, always use a cleaner before applying finish. Lack of preparation is the most common reason for deck stains and sealers to fail. Don’t skimp on this important step.
- Sweep off loose debris and clean between the cracks of the boards with a putty knife.
- Wet surrounding plants and shrubs. Cover them with clear plastic sheeting to prevent spotting with chemicals. Also cover siding with plastic or paper before staining.
- Use a paint roller with an extension handle, a garden sprayer or a stiff-bristled push broom to apply cleaner to the entire deck. Don’t allow cleaner to puddle in any area.
- Keep the deck wet with cleaner. Don’t allow the cleaner to dry. Speed up the process by having one person apply the cleaner and another person back-roll the deck. Back-rolling is a process in which one person uses a roller or broom to spread any puddles.
- Allow the cleaner to soak into the wood. Soaking time is usually no more than 10 minutes, but check the product instructions.
- Rinse the deck thoroughly with a garden hose or pressure washer.
- Allow deck to dry at least two days before applying a sealer.
- Stir the sealer or stain thoroughly. Don’t shake sealer. Bubbles will form in the finish.
- Apply a thin, even coat of sealer or stain over a two- to three-board section with a paint roller with an extension handle or a sprayer. Two thin coats are better than one thick coat that doesn’t properly adhere or dry.
